Modify the default tee into a custom tee
-
The default tee has equal dimensions on its three branches. Click
the
 (Modify
Component) tool, and select the tee.
(Modify
Component) tool, and select the tee.
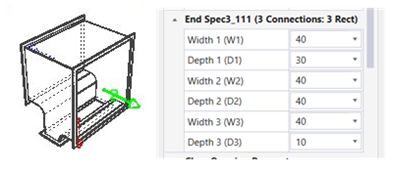
The DataGroup Properties panel appears on the Modify Component dialog.
- Place the cursor in the text field to the right of the first depth dimension D1, and key in a new size. Use the Tab or Enter keys to cycle through the properties. The fitting geometry updates to reflect the new depth dimension.
- Repeat step 2 for the other two depth properties D2 and D3. The fitting is updated. The change in geometry is pronounced.
- With the main branch dimensions edited, more dimensional changes are able to be generated. Place the cursor in the text field to the right of the Rise Value property. Key in a new value, and click the Tab or Enter key to accept.
- Modify the overall length of the tee by keying in a new value for the L property. Increase the radius between outlets one and three by modifying the R1 property.
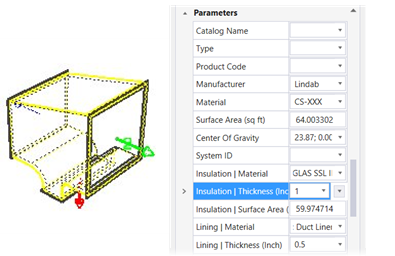
- (Optional) Add some insulation by keying in a value for the Insulation Thickness property.